The Gilded Rose Kata is a refactoring exercise. The full description is available on GitHub. I became aware of the kata quite late, namely at the SnowCamp conference in 2016. Johan Martinsson and Rémi Sanlaville did a live-code refactoring based on the Gilded Rose.
Nowadays, I think that the kata is much more widespread. It's available in plenty of languages, even some that are not considered mainstream, e.g., XSLT or ABAP. In this post, I'd like to do it in Rust. My idea is to focus less on general refactoring principles and more on Rust specifics.
- My first cup of Rust
- My second cup of Rust
- The Rustlings exercises - part 1
- The Rustlings exercises - part 2
- Rust on the front-end
- A Rust controller for Kubernetes
- Rust and the JVM
- diceroller, a sample Rust project
- Rust’s Vector
Implementing tests
We need to start the kata by implementing tests to ensure that refactoring doesn't break the existing logic.
There isn't much to say, but still:
Infinitest:
IntelliJ IDEA offers the Infinitest plugin for JVM languages. You can configure it to run your tests at every code change. As soon as your refactoring breaks the test, the banner turns from green to red. I didn't find any plugin similar for Rust.
Test location:
In Java, Maven has popularized the convention over configuration approach,
src/main/javafor application code andsrc/test/javafor tests. Usually, the test structure follows the main one. We can write the tests in the same file but in a dedicated module in Rust.// Main code #[cfg(test)] // 1 mod tests { // 2 use super::{GildedRose, Item}; // 3 #[test] pub fn when_updating_regular_item_sell_in_and_quality_should_decrease() {} // 4 #[test] pub fn when_updating_regular_item_quality_should_stop_decreasing_at_0() {} // 4 // Other tests }Ignored when launched as a regular application
- Dedicated module
- Because
testsis a dedicated module, we need to importstructfrom the parent module - Test functions
Clippy is your friend!
A collection of lints to catch common mistakes and improve your Rust code.
There are over 500 lints included in this crate!
Lints are divided into categories, each with a default lint level. You can choose how much Clippy is supposed to annoy help you by changing the lint level by category.
-- GitHub
On the command-line, cargo integrates Clippy natively. You can use it by running the following command in the project's folder:
cargo clippy
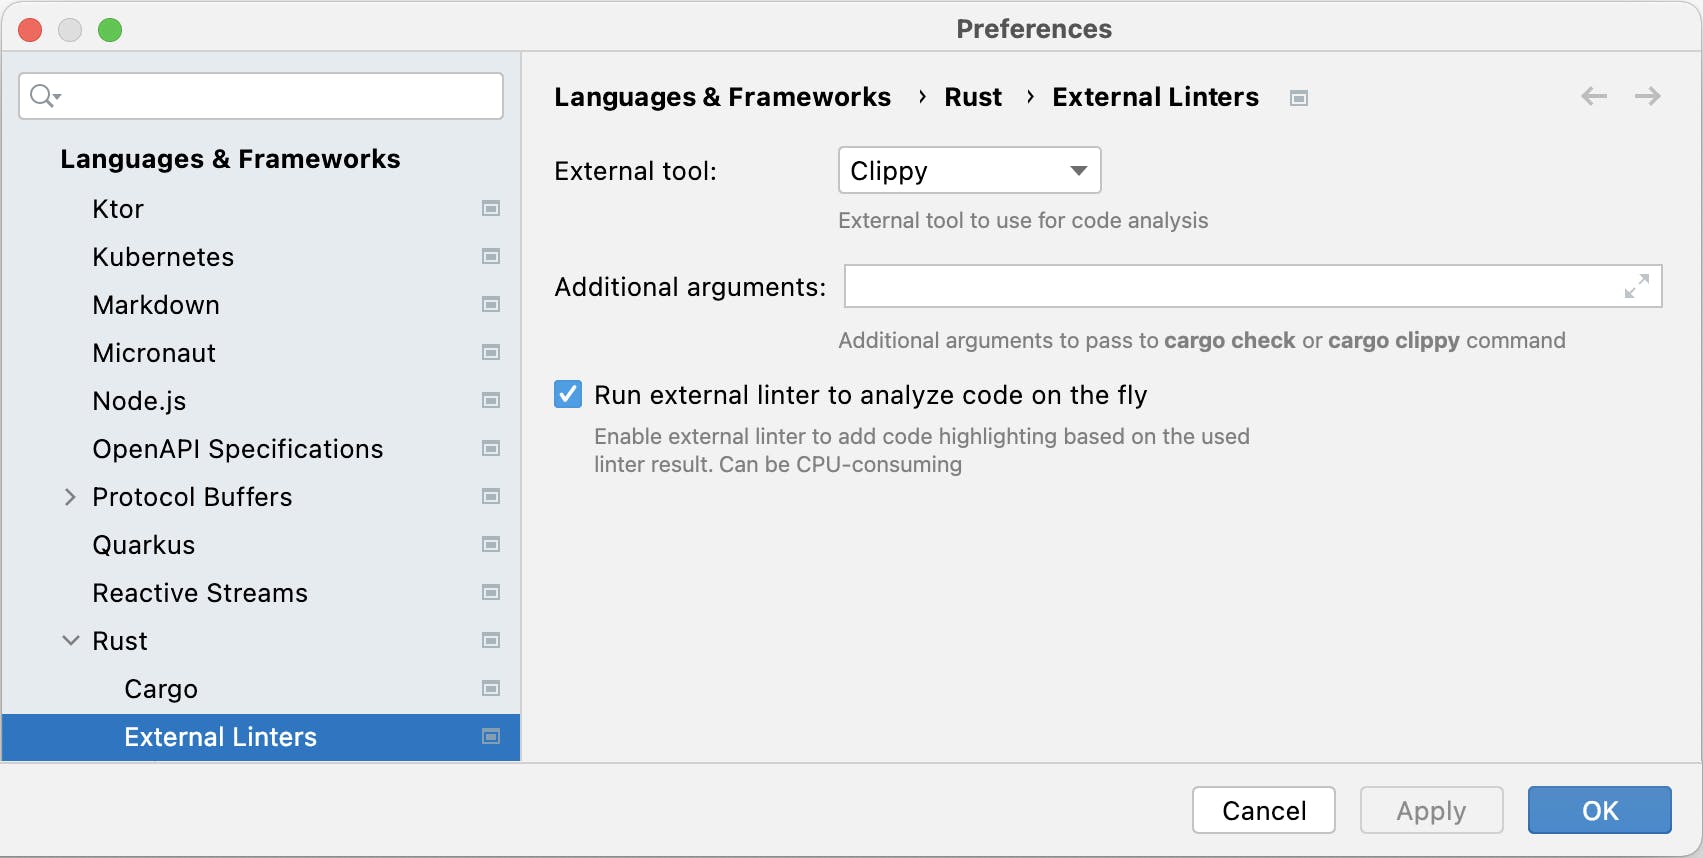
You can display Clippy's warnings inside of IntelliJ. Go to Preferences > Languages & Frameworks > Rust > External Linters. You can then select the tool, e.g., Clippy, and whether to run it in the background.

IntelliJ warns you that it may be CPU-heavy.
Clippy highlights the following statements:
item.quality = item.quality + 1;
item.quality = item.quality - 1;
As with Java, IntelliJ IDEA is excellent for refactoring. You can use the Alt+Enter keys combination, and the IDE will take care of the menial work. The new code is:
item.quality += 1;
item.quality -= 1;
Functions on implementations
In Java, a large part of the refactoring is dedicated to improve the OO approach. While Rust is not OO, it offers functions. Functions can be top-level:
fn increase_quality() {}
A function can also be part of an impl:
struct Item {
    pub quality: i32,
}

impl Item {
    fn increase_quality() {}   // 1
}

Item::increase_quality();      // 2
- Define the function
- Call it
A function defined in an impl can get access to its struct: its first parameter must be self or one of its alternatives - mut self and &mut self:
struct Item {
    pub quality: i32,
}

impl Item {
    fn increase_quality(&mut self) {    // 1
        self.quality += 1;              // 2
    }
}

let item = Item { quality: 32 };
item.increase_quality();                // 3
- The first parameter is a mutable reference to the
Item - Update the
qualityproperty - Call the function on the
itemvariable
Matching on strings
The original codebase uses a lot of conditional expressions making string comparisons:
     if self.name == "Aged Brie" { /* A */}
else if self.name == "Backstage passes to a TAFKAL80ETC concert" { /* B */ }
else if self.name == "Sulfuras, Hand of Ragnaros" { /* C */ }
else { /* D */ }
We can take advantage of the match keyword. However, Rust distinguishes between the String and the &str types. For this reason, we have to transform the former to the later:
match self.name.as_str() {                                       // 1
    "Aged Brie"                                 => { /* A */ }
    "Backstage passes to a TAFKAL80ETC concert" => { /* B */ }
    "Sulfuras, Hand of Ragnaros"                => { /* C */ }
    _                                           => { /* D */ }
}
- Transform
Stringto&str- required to compile
Empty match
The quality of the "Sulfuras, Hand of Ragnaros" item is constant over time. Hence, its associated logic is empty. The syntax is () to define empty statements.
match self.name.as_str() {
    "Aged Brie"                                 => { /* A */ }
    "Backstage passes to a TAFKAL80ETC concert" => { /* B */ }
    "Sulfuras, Hand of Ragnaros"                => (),         // 1
    _                                           => { /* D */ }
}
- Do nothing
Enumerations
Item types are referenced by their name. The refactored code exposes the following lifecycle phases: pre-sell-in, sell-in, and post-sell-in. The code uses the same strings in both the pre-sell-in and post-sell-in phases. It stands to reason to use enumerations to write strings only once.
enum ItemType {                                        // 1
    AgedBrie,
    HandOfRagnaros,
    BackstagePass,
    Regular
}

impl Item {
  fn get_type(&self) -> ItemType {                     // 2
    match self.name.as_str() {                         // 3
      "Aged Brie"                                 => ItemType::AgedBrie,
      "Sulfuras, Hand of Ragnaros"                => ItemType::HandOfRagnaros,
      "Backstage passes to a TAFKAL80ETC concert" => ItemType::BackstagePass,
      _                                           => ItemType::Regular
    }
  }
}
- Enumeration with all possible item types
- Function to get the item type out of its name
- The match on string happens only here. The possibility of typos is in a single location.
At this point, we can use enumerations in match clauses. It requires that the enum implements PartialEq. With enumerations, we can use a macro.
#[derive(PartialEq)]
enum ItemType {
    // same as above
}

fn pre_sell_in(&mut self) {
    match self.get_type() {
        ItemType::AgedBrie       => { /* A */ }
        ItemType::BackstagePass  => { /* B */ }
        ItemType::HandOfRagnaros => (),
        ItemType::Regular        => { /* D */ }
    }
}

// Same for post_sell_in
Idiomatic Rust: From and Into
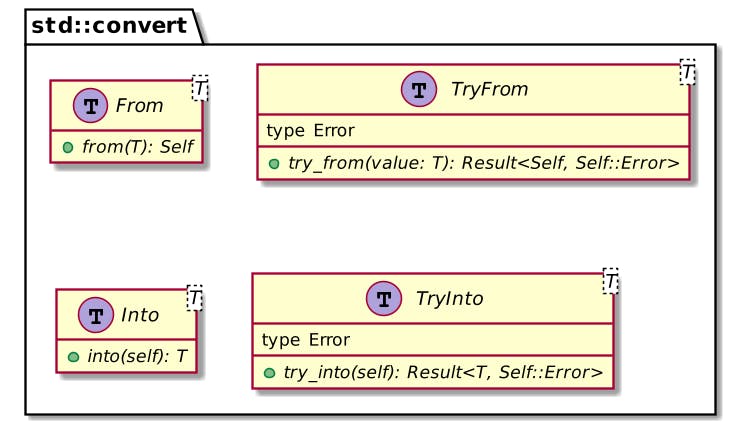
Because of its strong type system, converting from one type to another is very common in Rust. For this reason, Rust offers two traits in its standard library: From and Into.

Used to do value-to-value conversions while consuming the input value. It is the reciprocal of
Into.One should always prefer implementing
FromoverIntobecause implementingFromautomatically provides one with an implementation ofIntothanks to the blanket implementation in the standard library.
In the section above, we converted a String to an ItemType using a custom get_type() function. To write more idiomatic Rust, we shall replace this function with a From implementation:
impl From<&str> for ItemType {
    fn from(slice: &str) -> Self {
        match slice {
            "Aged Brie"                                 => ItemType::AgedBrie,
            "Sulfuras, Hand of Ragnaros"                => ItemType::HandOfRagnaros,
            "Backstage passes to a TAFKAL80ETC concert" => ItemType::BackstagePass,
            _                                           => ItemType::Regular
        }
    }
}
We can now use it:
fn pre_sell_in(&mut self) {
    match ItemType::from(self.name.as_str())  {       // 1
        ItemType::AgedBrie       => { /* A */ }
        ItemType::BackstagePass  => { /* B */ }
        ItemType::HandOfRagnaros => (),
        ItemType::Regular        => { /* D */ }
    }
}
- Use idiomatic
Fromtrait
Because implementing From provides the symmetric Into, we can update the code accordingly:
fn pre_sell_in(&mut self) {
    match self.name.as_str().into()  {                // 1
        ItemType::AgedBrie       => { /* A */ }
        ItemType::BackstagePass  => { /* B */ }
        ItemType::HandOfRagnaros => (),
        ItemType::Regular        => { /* D */ }
    }
}
- Replace
Frombyinto()
Conclusion
Whatever the language, refactoring code is a great learning exercise. In this post, I showed several tips to use more idiomatic Rust. As I'm learning the language, feel free to give additional tips to improve the code further.
The complete source code for this post can be found there:
Originally published at A Java Geek on February 6th, 2021
